I've updated both these and my previous anisotropic hair shaders to handle ambient occlusion. I use the second UV set for Ambient Occlusion
Maya CGFX File:
kajiyakay.cgfx |
Unity Shader File:
kajiyakay.shader |
Cross-Origin-Embedder-Policy="require-corp" Cross-Origin-Opener-Policy="same-origin"
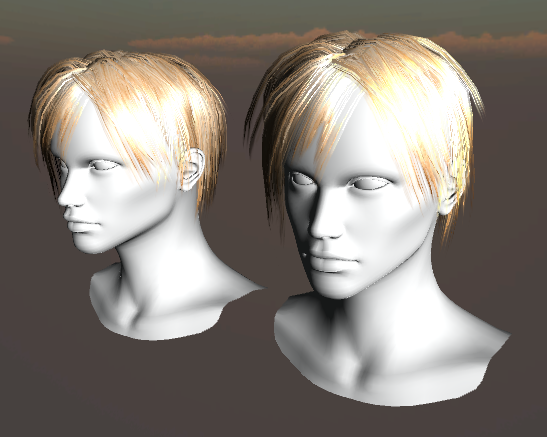
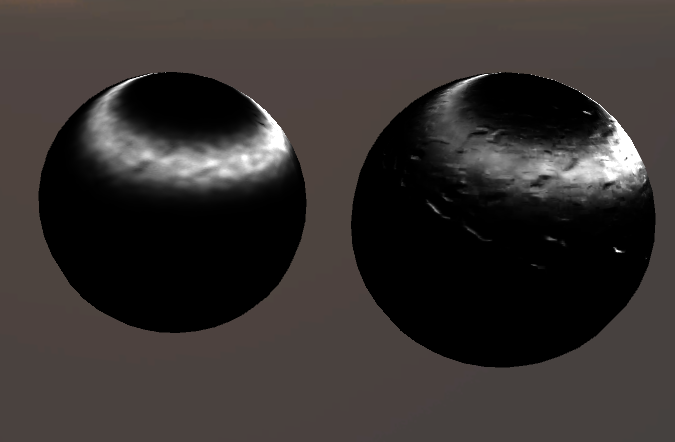
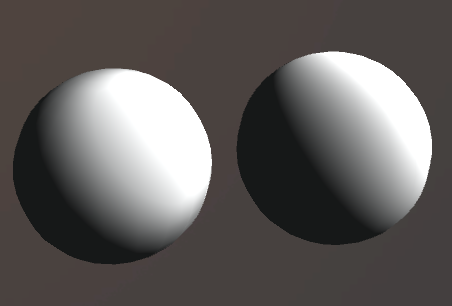
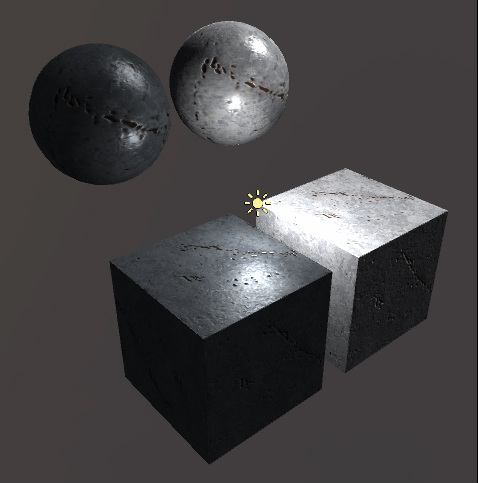
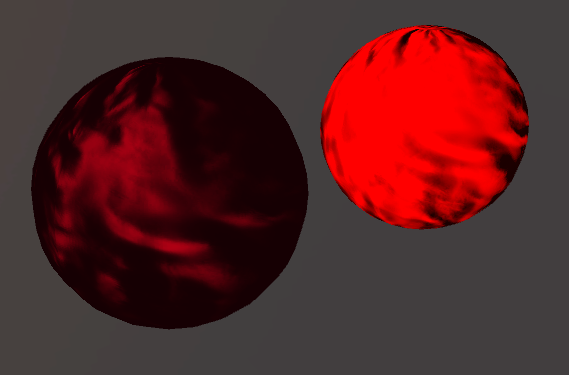
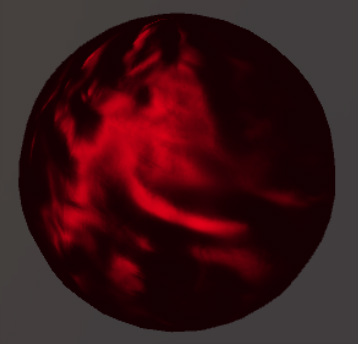
In my searches for the more advanced hair shading techniques, i stumbled upon the full paper that discussed the sorting technique from before. It cleared a few things up, but also demonstrated a Kajiya-Kay specular lighting technique with a few ideas taken from Marschner. So I stole it (for learning of course). Here is my previous implementation on the left and Kajiya Kay on the right. The differences are subtle, mostly manifesting in a differently colored highlight and the ability to shift the highlight along the hair. 
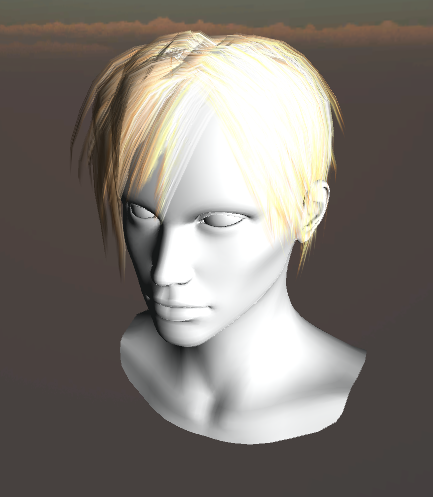
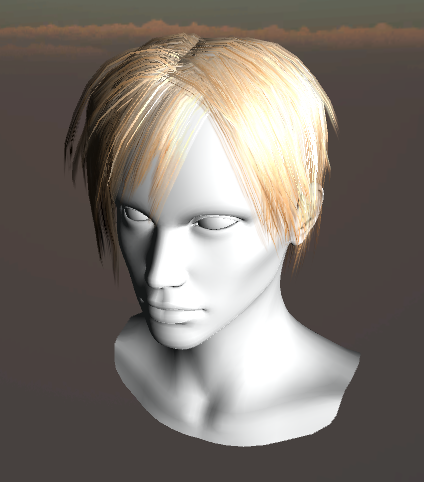
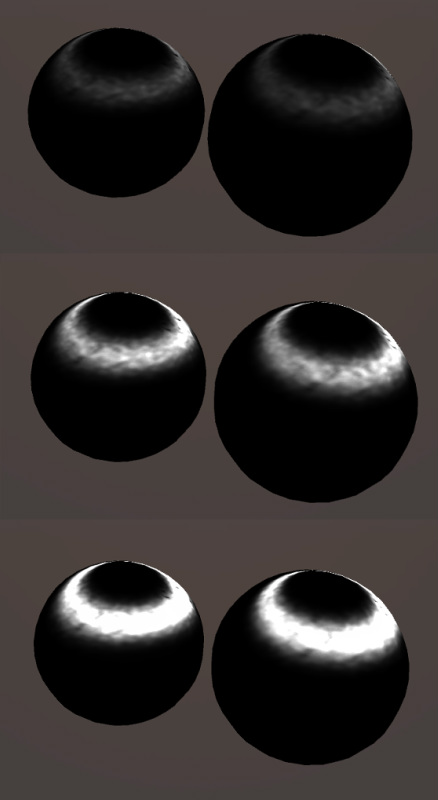
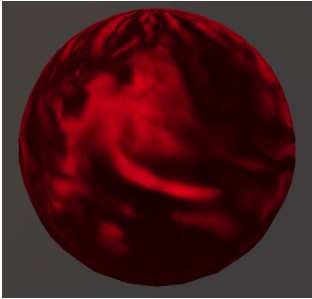
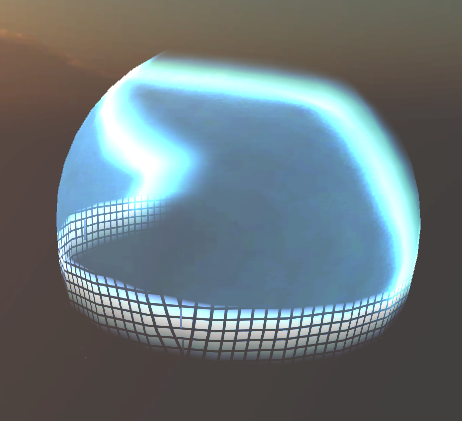
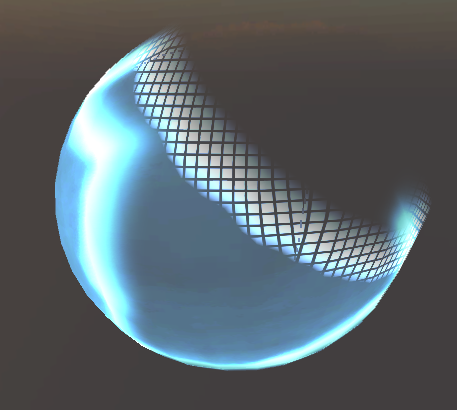
EDIT: I finally came back and figured out Ambient Occlusion with transparency. It improves hair layering quite a bit. Before and After: 
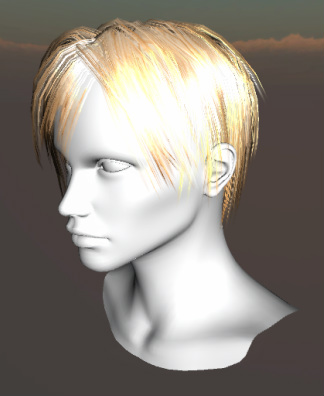
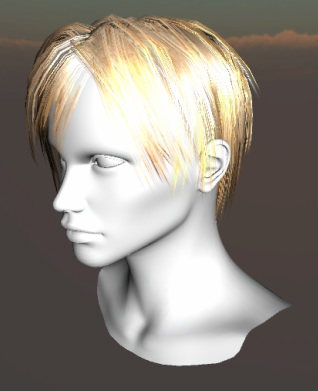
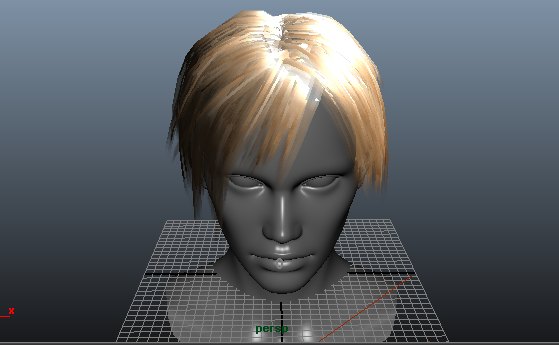
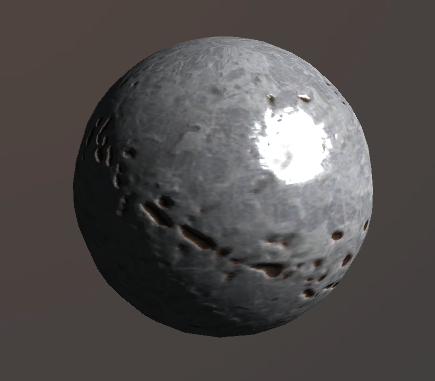
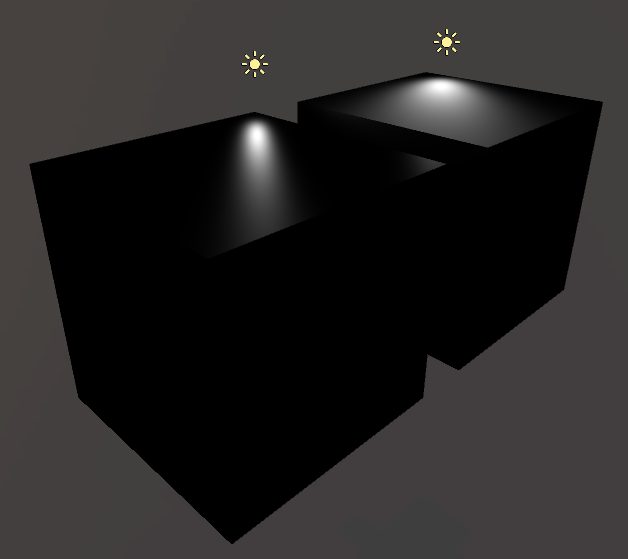
In order to generate Ambient Occlusion with an alpha map, you have to follow a slightly hacky procedure: First assign your texture with alpha to a lambert material and unlink all lights in your scene. Next, add some shadow casting ambient lights. Cast shadows are off by default, so you will need to check the options. I used 4 to surround the hair from above, but you will probably need more for objects like trees. Here is my baking setup, ugly alpha sorting and all: 
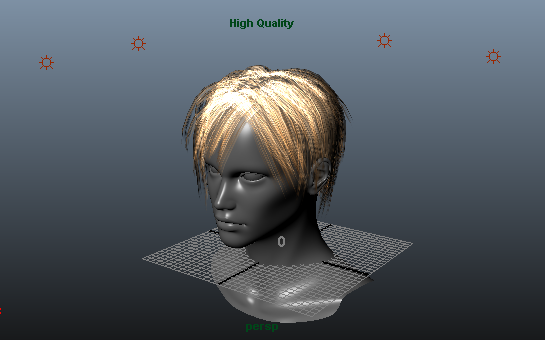
Next, go to the texture bake set and set it to bake 'Light Only' - higher samples generally looks better, everything else is pretty irrelevant. Finally, open the Mental Ray Baking Options and and ensure bake shadows is checked before baking your lighting. And you are done. Oddly enough this tends to bake faster than true Occlusion, even on high sample amounts. WTF Maya? I've updated both these and my previous anisotropic hair shaders to handle ambient occlusion. I use the second UV set for Ambient Occlusion Maya CGFX File:
Unity Shader File:
0 Comments
I started this as a fix for Unity's transparency sorting issues and it kind of snowballed from there. Transparency sorting is a somewhat tricky issue, and this becomes abundantly clear when trying to create hair. I was wanting to try out a few hair shaders since i just finished Anisotropic highlights, but the sorting issues were driving me up the wall. Fortunately i found this paper which presented a solution. Basically it is a multipass shader that renders a depth mask first, and then renders the regular lighting with some adjusted depth settings. By rendering a depth mask early, they are able to avoid using alpha clip ever again. This results in properly sorted double faced transparency (I really should try this on some of my other shaders). Here is some hair i made real quick on a female head i got from turbosquid. Its not the greatest but hey that's why i'm not a character artist. On the Left we have Unity's transparent specular. You can see the z fighting all along the left side. On the right we have my shader, with corrected sorting. I liked the results so much it forced me to try out multipass in maya and i got it working in there too. I included an unlit version in that one, in case the anisotropic lighting slows things down too much while modeling. The transparency is a little ugly because of how Maya mips textures in the viewport for cg shaders but it works. I did handle a few things slightly differently. Rather than setting the alpha clip threshold to 1, I set it to 0.3 and expose a power attribute to adjust the amount of blending/clipping. Additionally, in the paper they mentioned turning the depth writing back on during the final pass, but this caused some areas to disappear so i turned it off again ¯\_(ツ)_/¯ EDIT: I updated the shaders to include Ambient Occlusion. For more infomation about this and how to bake AO with an alpha, check out my Kajiya Kay implementation. Maya CGFX File:
Unity SHADER File:
I actually started this last week but got sidetracked because i wasn't satisfied with the implementation i came up with. Most resources i found do not respect normal maps when it comes to calculating anisotropic reflection which i wasn't particularly a fan of. Anisotropic highlights use tangent and binormals to calculate the specular highlight, and these are generally ignored when it comes to normal mapping (they generally aren't relevant to the lighting). In order to fix this I attempt to calculate per pixel tangent and binormal vectors based a cross product with the normal map. This is a little more expensive and may turn out to be inaccurate but i think it looks a bit better than vertex normals. But hey i'm just an artist who likes to hack things, what the hell do i know about doing things properly? Vertex normals on the left, per pixel normals on the right. Another minor issue was the use of a few square roots, exponents, divisions and multiplications. After the dot products being divided by the anisotropic controls, everything else seemed to be modifying intensity, but having very little visible effect. I'm not really a fan of extra calculations, so i replaced it with a division by pi which seemed to have the roughly the same effect. This misses out on a bit of rimlight hotness though, so i approximated that with (pow( (1-ndotV), 3) * 3) * specTotal and added that to the specular total prior to the pi division. The multiplication by 3 is arbitrary and it might be possible to find a better value but this looks close enough to me. You can see my approximation below on the left using vertex normals, compared to true Ward specularity on the right, with specular multipliers of 1, 4, and 8 respectively. Overall i'm pretty happy with it. It's kinda cool to be able to fake these more advanced shaders with cheaper implementations. I'll have to re-look at Cook Toorance and Strauss at some point to see if I can gain anything with similar fakes. Of course if anyone can find a reason why these ideas wouldn't work i'm open to suggestions. Maya CGFX File:
Unity SHADER File:
A lot of these physically based models have papers which draw comparisons to another shading model called Cook Torrance. Cook Torrance has quite a few features which make it an attractive physical model: it features a roughness term like Oren-Nayar, and a frensel term that modifies the specular highlight based on viewing angle. Additionally, it calculates self shadowing from micro facets similarly to Strauss. It seems very similar to Strauss actually, and incorporates a lot of the same concepts. For my implementation I used Beckmann Distribution to calculate roughness and Schlick's approximation for the Frensel. One of the most interesting things is it's use of the frensel, which directly contributes to the diffuse and specular highlights. When the frensel reflection an roughness are set to 1 , it looks a lot like the frensel i've been adding to the diffuse for a while, albeit modeled much more nicely. Cook Toorance on the left, modified phong on the right. I'm just going to go ahead and pretend that it wasn't a complete hack and was exactly what i was going for in the first place ^_^ Maya CGFX File:
Unity SHADER File:
This is a shader technique used for approximating specular highlights. Most phong derivatives use a specular power and the power function is one of the more expensive operations in shaders. That's why Christophe Schlick proposed a way to approximate this effect in his paper. He goes into a few other approximations that can be made which are honestly pretty slick, but I'm focusing on the specular here. Here we have Schlick's specular on the left and phong on the right both with a "specular power" of 40. As you can see the highlight spreads out somewhat but the core follows essentially the same shape as with phong. Some might even find this preferable to phong, as perfectly sharp highlights can seem artificial. The cool thing is this technique could be applied to other things that use power as well, which could save you some instructions to spend elsewhere. For example, this should work equally well for a blinn shader. Maya CGFX File:
Unity SHADER File:
Oren Nayar got me more interested in physically based shaders. In the simplest sense, they are shaders that approach lighting from a Physics rather than mathematical perspective. Oren Nayar does this by adding a roughness attribute that attempts to simulate the effects of microscopic bumps on light reflection. While these bumps would be smaller than a pixel, their effect is quite noticeable in terms of overall light contribution, and so they are worth taking into account. Strauss is another shading technique that is physically based. I based my implementation on this post. The interesting thing about Strauss is that it only uses 3 attributes to calculate diffuse and specular light: how smooth the surface is , how metallic it is, and how transparent it is. This greatly simplifies the material setup and makes the lighting more consistent than phong, producing a wider range of materials and generally producing more realistic results. Consider the following scenario, with Strauss on the left and Phong on the right. As you can see the light is causing the phong to blow out in areas, and is generally more plastic in appearance. While we could adjust the Phong to work better, this might cause it to look worse in another lighting situation. For example, a common hack would be to tint the diffuse with a darker color, say 50% grey. This would keep your highlights from blowing out but it would also make your shadows twice as dark. This leads to more hacks and tweaks, which eventually means that all the materials are carefully tweaked to work for certain scenarios, but perform worse in others. Instead, by taking a few more things into account in the shader, we can get more consistent results with less work - always a good thing. 1 thing to note is that i haven't figured out what to do with my spec map yet. It seems rather silly to use for this shader but i haven't got a better solution just yet so it stays as it is for now. It will probably become either a metallic or roughness map in the future once i learn a bit more about physically based rendering, but i'm not sure what makes the most sense yet. Maya CGFX File:
Unity Shader File:
After getting Oren-Nayar working, I started looking for quicker solutions, as I can't justify moving to SM 3.0 just for diffuse lighting. I happened upon Pope Kim's blog post about an optimized Oren-Nayar shader they implemented for Warhammer 40000: Space Marine. It provided a neat solution that got me back to SM 2.0 (YAY!) but it wasn't quite as good of a match to true Oren-Nayar as i had hoped. Specifically the view dependent Intensity was dimmed somewhat. After a few hours of testing i was able to come up with a solution that brought the intensity back up to normal when the view and light directions were roughly aligned. I found that in this case, if the soft rim light was multiplied by 0 instead of the "fakey_magic" value, the light intensity was corrected. In cases where the light and view vectors were perpendicular, the "fakey_magic" value held true. So in my final implementation I simply multiplied his "fakey_magic" value by a "fakeyFix" value calculated as: 1-(saturate(dot(L,V)) * result ). By setting "fakeyFix" to 1 minus the saturated dot of the light and view vector, I assured the value would be 0 when perfectly aligned and 1 when perpendicular. By multiplying by "result" aka dot(NormalDir, LightDir), we reduce any shadow artifacts due to this method (when rotating towards parallel, the brightness intensifies much too rapidly. This brings it back to normal ranges). Below you can see some comparisons from different views. 1 is full Oren-Nayar, 2 is Pope Kim's approximation, and 3 is my derivative approximation. So far I haven't seen any issues with this approach, but it is a hack on top of a hack on top of what is probably another hack, so uh...buyer beware. In any case I'm gonna call it good for now. All the excitement of exploring diffuse shading has me a bit overwhelmed. Maya CGFX File:
Unity SHADER File:
Oren-Nayar is another alternative diffuse model. It takes the roughness of the surface into account, making it quite suitable for brick, concrete, sand, or numerous other materials. By parameterizing the roughness , we can have a suitable model for everything from a perfectly smooth surface (like lambert) to a rough surface like concrete or chalk. Below you can see Oren-Nayar with 100% roughness on the left and Lambert on the right. Rougher surfaces have a slower falloff which Oren-Nayar takes into account. If we were to go back to 0 roughness it would regain the hotspot like lambert, simulating a smooth surface. Here it is applied to the brick i use way too often to test things. As you can see, Oren-Nayar gives us the matte look we would expect from brick. Unfortunately it is somewhat expensive (pushed me into SM 3.0 with no spec...Yikes!) so i'll be looking for cheaper alternatives. Maya CGFX File:
Unity SHADER File:
Minnaert is a modification of Lambert that works by attenuating the intensity by the view angle and light direction. This means that the surface will be brightest when the light and view directions are parallel and areas facing away from the light will become darker more quickly when compared to Lambert, although the darkest point will never become darker than an equivalent Lambert surface. This is useful for things like cloth. Velvet is a common use case and the results are pretty convincing. Here are 2 shaders with essentially the same settings: 100% Red, no Rim light, no Specular, using a water normal map. On the Left is Minnaert with a darkening factor of 4, while on the right is Lambert. You could get equivalent effects to Lambert by simply setting the darkening factor to 0. It is also a shader that I find benefits a lot from a Rim Light, although it's not so physically accurate (It's can't be attenuated like real lights and so will appear brighter than your real lights. Therefore its a good idea to use lower brightness values). Here is the same shader with a 50% intensity rim light on the left and with no rim light on the right. For ease of demonstration, I stripped specularity completely. You can add whatever specular model you wish back in if you need it. Maya CGFX File:
Unity SHADER File:
Since i first started working with specularity in CG, I have been using the Phong model. I like Phong. It's simple, holds up well at grazing angles, and has generally predictable effects. It does have some known disadvantages though, one of which is the shape of the specular falloff at high angles of incidence. Basically phong remains blobby where we would want it to stretch out toward the viewer. Blinn-Phong addresses this by constructing a halfway vector between light and view direction and retrieving the dot product of the halfway vector and the normals, in place of Phong's dot product of the reflection vector and light vector. This handy illustration shows the effect, with Blinn-Phong specularity on the left and Phong specularity on the right. It does come with a few of its own issues, notably at grazing angles where is seems to form a singularity rather than going stretchy like Phong. This might be worth investigating further in the future. Maya CGFX File:
Unity SHADER File:
This shader combines a few of the concepts from before to create a basic holographic effect. I use single sample world uvs to keep the blend texture from being distorted by vertex deformation and blend the vertices visibility in sync with the deformation. This produces a nice blending effect which could be modified to produce force-fields, shields, or whatever other sci-fi magic you might need. Here are some shots of it in multiple states of blending. It can blend in any direction and has separate controls for the alpha and vertex blending falloff. Here is a video i made way back in the day of an early prototype, before i ported it to CG. Maya CGFX File:
Unity SHADER File:
|
CG ShadersShaders I've built as i teach myself CG. Feel free to download and use for whatever. If you like them you can buy me a beer or something. Archives
December 2014
Categories |